There are a lot of steps in implementing a backend for your iOS app with Google App Engine and adding Firebase authentication to it, with some tricky bits during the setting up of the tools. Hopefully, this quickstart guide will help you to smoothly implement your backend, without missing any of the tricky steps (and spending hours, or maybe days on debugging).
In this tutorial, we will set up a backend for a simple note-taking application that stores users' notes in their own personal notebooks. This tutorial continues from part 1, where I explain the configuration of the components that comprise this backend. If you are unfamiliar with GAE or Firebase, I would strongly recommend reading through the part 1 first. This app is based on the official Google tutorial. Although, the official tutorial is based on a Javascript frontend, we will ignore the frontend and use the backend for powering our own iOS frontend.
Step 1 - Prerequisites
-
You need to have Git and Python 2.7 installed on your system. Additionally, if you want to integrate the backend in an iOS app, you'll need Xcode 7.0 (or later) and CocoaPods 1.0.0 (or later).
-
Create a Google Cloud Platform project :
- Go to Google Developers console and click 'Create Project'.
- Make a note of the project ID, which might be different from the project name. The project ID is used in commands and in configurations.
-
Install gcloud tool for your platform. This tutorial was initially written to use Google Cloud SDK 138.0.0 running on a MacOS OS X El Capitan machine but has been tested to work on Google Cloud SDK 175.0.0 and MacOS Sierra.
-
Import the Google Cloud Platform project from step 2 in the firebase console by clicking on 'IMPORT GOOGLE PROJECT' and selecting the above project. Make a note of the firebase project id.
-
Enable Email/Password authentication for the project in firebase console by clicking Auth > Sign-in method. Under Sign-in providers, hover the cursor over a provider and click the pencil icon to edit the sign-in method.
Step 2 - Get the backed code.
-
- Download and unzip the example backend project. This project is based on the Google Cloud Platform python samples
-
Navigate to the directory that contains the sample backend code by running
cd webApp2App -
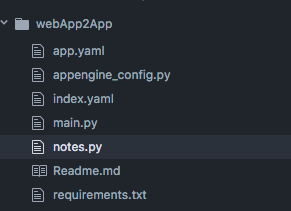
The webApp2App directory should have the following files :
-
An app.yaml file - This configures the App Engine application's settings e.g. how URL paths correspond to request handlers and static files.
-
An index.yaml file - This tunes the indexes for the properties of entities used in your application. Don't worry if you don't yet understand what this means.
-
A main.py file - This defines the route handlers for the api.
-
A notes.py file - This defines the handlers for the api corresponding to the notes endpoint.
-
An appengine_config.py - This file has a method which registers the libraries directory for the app. Please note that if you need to include your app backed in unit tests, you will need to additionally import this file in your test script file.
-
Step 3 - Install the requirements for the backend.
-
Set up and run a virtual environment by running the following commands from the webApp2App directory
pip install virtualenv virtualenv venv source venv/bin/activate -
Install the third-party requirements that are not included in the App Engine SDK
pip install -r requirements.txt -t lib
Step 3 - Understand and configure the backend code.
An app.yaml file specifies the services that run on the server and the scripts where the corresponding request handlers are defined.
-
Edit the app.yaml file and replace the PROJECT_ID with your firebase project id from step 1.4.
-
Note, the 'service' property in the app.yaml is currently specified as 'main'. Since, our app only has one service, this is also the default service.
Step 4 - Run the backend locally
-
You can now run your backend locally by running the following command from the webApp2App directory.
dev_appserver.py app.yaml -
If you will be running your iOS app on a iOS device instead of a local simulator, you will need to start the development server with the following command, with
replaced by your computer's IP address. dev_appserver.py --host <YOUR IP address> app.yaml -
You can check your local Google App Engine instances by visiting http://localhost:8000/instances on your web browser.
-
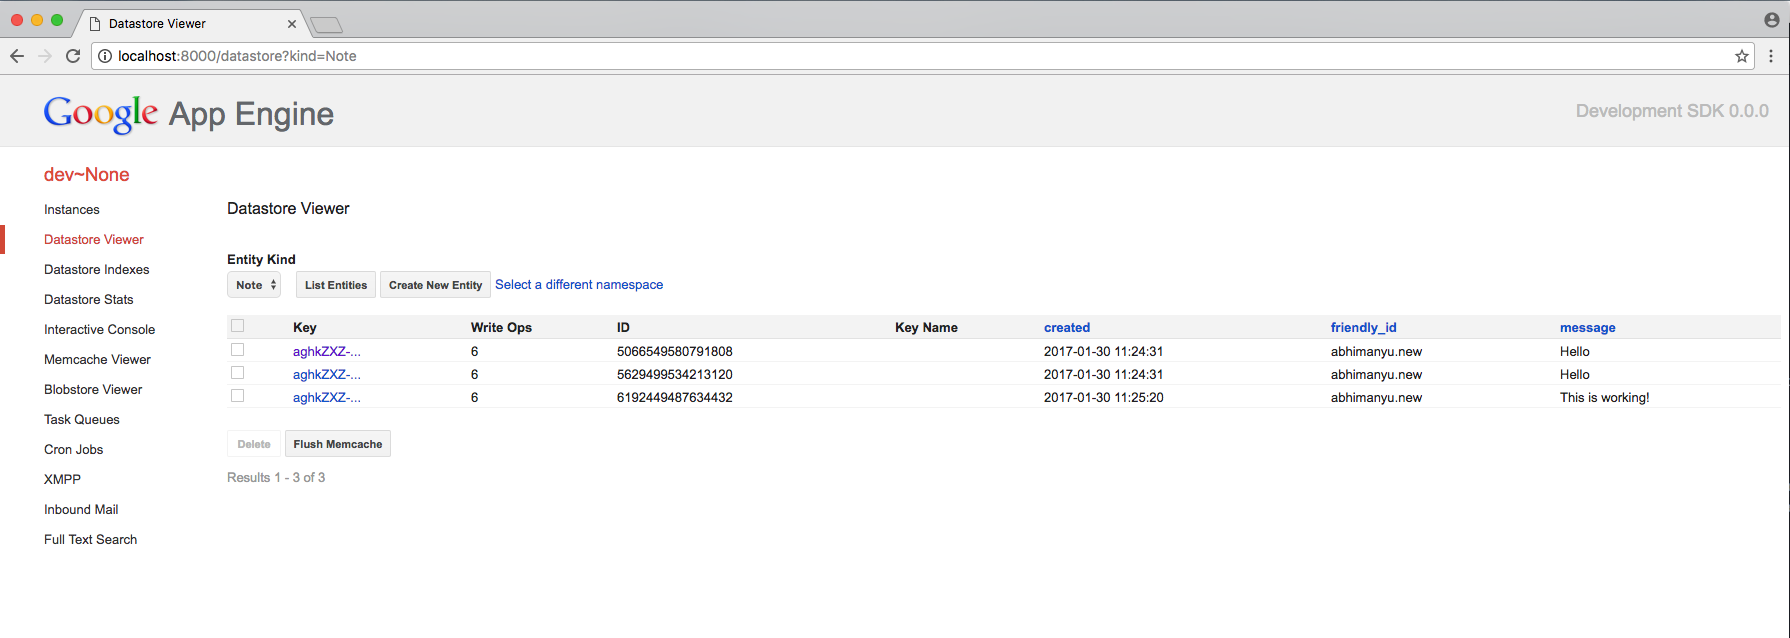
When a user creates notes on your server, you will be able to view them locally by visiting http://localhost:8000/datastore on your web browser. When you have some notes, this will look as below:
Step 5 - Deploy the backend
- You can deploy the backend (the backend will run on Google servers) by running the following from the backend directory.
gcloud app deploy index.yaml app.yaml
Step 6 - Add Firebase to the iOS app.
To add firebase to an example iOS app, follow the below steps:
-
Download the example project. If you open the sample app's FrontEndTest.xcodeproj file in Xcode, the directory structure of you app will look as below:

-
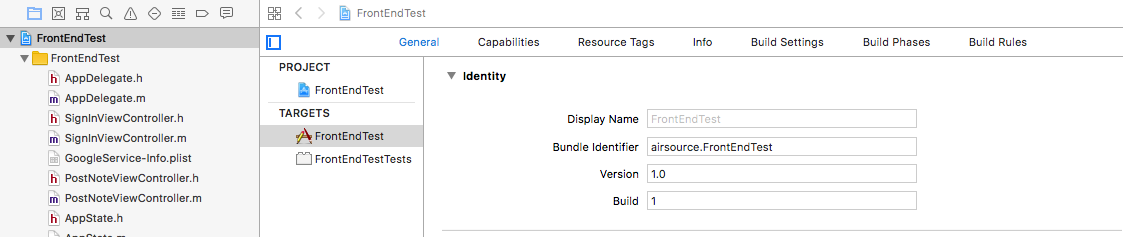
You'll need to make a note of the iOS app's bundle ID before continuing. This can be found by clicking the project name in Xcode and reading the Bundle Identifier property from the General Tab.
-
Open your Firebase project in the firebase console and add firebase to your iOS app by clicking 'Add app', selecting 'iOS' and then following the setup steps.
-
When prompted, enter your app's bundle ID. It's important to correctly enter the bundle ID that your app is using.
-
Download the GoogleService-Info.plist file and copy this into your Xcode project root. If you are using the example project, replace the existing GoogleService-Info.plist file with the one you have just downloaded.
Step 7 - Add Firebase to the iOS app.
-
Create a Podfile for your project if you don't have one by running
pod initfrom your project directory. The Podfile is already present in the example project and you can skip this step if using the example project. -
Add the following pods 'Firebase/Core' and 'Firebase/Auth' to your Podfile. These are already present in the example project and you can skip this step if using the example project.
-
Install the above pods by running
pod install. From now close the FrontEndTest.xcodeproj (or your-project.xcodeproj if you are using your own Xcode project) and you should use FrontEndTest.xcworkspace (or your-project.xcworkspace). -
You will notice that the example project imports the Firebase module in the UIApplicationDelegate subclass AppDelegate:
@import Firebaseand configures a FIRApp shared instance[FIRApp configure]in the app'sapplication:didFinishLaunchingWithOptions:method.// AppDelegate.m // FrontEndTest #import "AppDelegate.h" @import UIKit; @import Firebase; @interface AppDelegate () @end @implementation AppDelegate - (BOOL)application:(UIApplication *)application didFinishLaunchingWithOptions:(NSDictionary *)launchOptions { // Override point for customization after application launch. [FIRApp configure]; return YES; ...
Step 8 - Get Firebase authentication token and add it to URL requests
-
The sample app FrontEndTest is a very simple app with just two ViewControllers - SignInViewController and PostNoteViewController. The SignInViewController allows the users to register/sign in using their email-id and password while the PostNoteViewController allows the user to post and get their saved notes. When a user registers/signs in to the iOS app, they send their username and password to the firebase server. The server checks the credentials and returns a token if they are valid. The example project retrieves the token in our iOS app in the following manner.
FIRUser *currentUser = [FIRAuth auth].currentUser; [currentUser getTokenForcingRefresh:YES completion:^(NSString *_Nullable idToken, NSError *_Nullable error) { if (error) { // Handle error return; } // Store the idToken in your app to be sent to your backend via HTTPS // ... }]; -
We can now add this token as the Bearer property in the Authorisation Header of any HTTP request we make to our Google App Engine server. For e.g. if we have a NSMutableURLRequest object called request,
[request setValue:[NSString stringWithFormat:@"Bearer %@", self.id_token] forHTTPHeaderField:@"Authorization"];
Step 9 - Configure iOS app requests to the Google App Engine Server.
-
Configure your requests to use the Google App Server's base url or your localhost url (
http://localhost:8080if running your app on the simulator orhttp://YOUR-IP-ADDRESS:8080if running your app on a device). If you are using the example project, you'll need to change the hostname property inside theviewDidAppearmethod of the PostNoteViewController. If you create your own requests, remember to change the URL to your own base url.- (void)viewDidAppear:(BOOL)animated { //Option 1 - use your ip address if you have deployed your app on your local machine // _hostname =@"http://YOUR-IP_ADDRESS:8080"; //Option 2 - use the Google App Server's base if you have deployed your app on GAE // _hostname =@"my-project-id.appspot.com"; ... -
Create methods to create HTTP requests to your API. If you are referring to the sample app, these have already been created for you. For. e.g. the method
formAfGetRequestWithTokencreate an HTTP GET request to thehttp://_hostname/notesendpoint with the firebase token added to the Authorization header of the request.-(void) formAfGetRequestWithToken:(NSString*) token { AFURLSessionManager *manager = [[AFURLSessionManager alloc] initWithSessionConfiguration:[NSURLSessionConfiguration defaultSessionConfiguration]]; NSMutableURLRequest *req = [[AFJSONRequestSerializer serializer] requestWithMethod:@"GET" URLString:[NSString stringWithFormat:@"%@/notes",_hostname] parameters:nil error:nil]; req.timeoutInterval= [[[NSUserDefaults standardUserDefaults] valueForKey:@"timeoutInterval"] longValue]; [req setValue:@"application/json" forHTTPHeaderField:@"Content-Type"]; if ([req.allHTTPHeaderFields objectForKey:@"Authorization"] == nil) { //NSLog(@"token is %@",token); NSString *authValue = [NSString stringWithFormat:@"Bearer %@", token]; [req setValue:authValue forHTTPHeaderField:@"Authorization"]; } -
Look through the sample app's code for examples of how to handle the HTTP response from your backend. Please note that there are a variety of libraries available that'll allow you to make requests and parse received json objects much more efficiently.
-
You can now build your project and run your iOS app on any iOS device or simulator and should have a working app with a connected backend.
Congratulations! You now deployed a functioning backend for the example iOS project. You should now be able to use the iOS app to create and retrieve notes for users.